XAMPP Installation For Beginner or Web Developer/Desginer
XAMPP is a widely used open-source software stack that includes Apache, MySQL, PHP, and Perl, making it a perfect solution for setting up a local development environment. Whether you’re a web developer or designer, having a local server on your Windows machine can streamline your workflow and help you test your web applications offline. In this guide, we’ll take you through the step-by-step process of installing and configuring XAMPP
XAMPP Server is a free package and open source tools for windows, provide you to install and web browers of application that use (Apache,PHP and MYSQL). XAMPP stands for (X) Cross-platform, (A) Apache, (M) MySQL, (P) PHP, (P) Perl. we are configured the XAMPP server in your local system, XAMPP server easily work with PHP framework like (WordPress, Joomla, drupal, Codeigneter, Cakephp etc) by developers to test the websites.
There are some other local server name like WAMP , VertrigoServ
XAMPP on Windows 10, as well as the instructions to configure the web environment and fix common problems after the setup in this guide step by step.
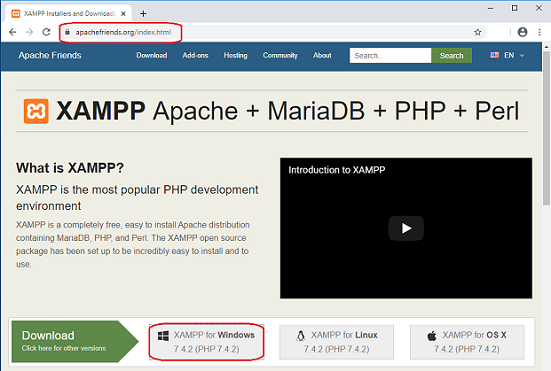
STEP-1: Download XAMPP Server For Windows
The official link Apache Friends to download XAMPP and install cross-platform like Windows, Linux, Mac OS Such as below:-
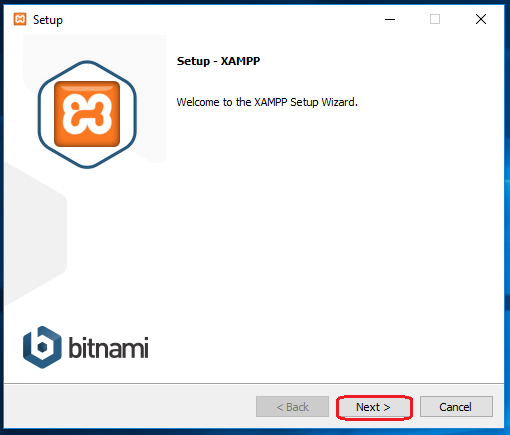
Step 2: Run the Installer to Install XAMPP
Setup” window will appear on the screen. Then, click on the “Next” button.
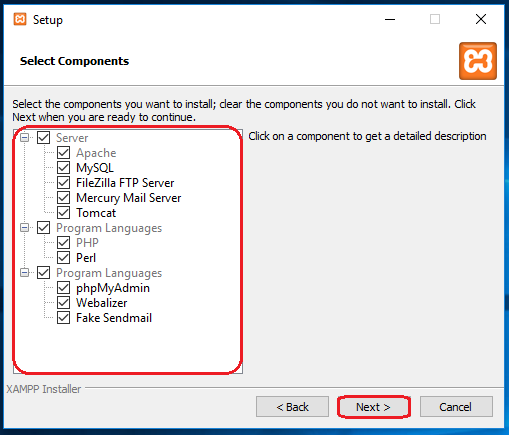
Step-3:- Select the components that you want to install and click on the “Next” button.
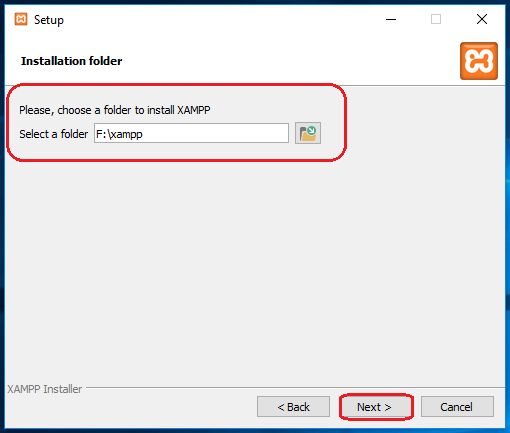
Step-4
Choose a folder with desire drive to install the XAMPP and click on the “Next” button.

Step-5
After Step-4 Show Step-5 Uncheck the “Learn more about Bitnami for XAMPP” option and click on the “Next” button.
Step-6
Window will appear on the screen, then click on the “Next” button.

Step-7
The XAMPP Server should run like apache,mysql services properly and show the green color and port also.
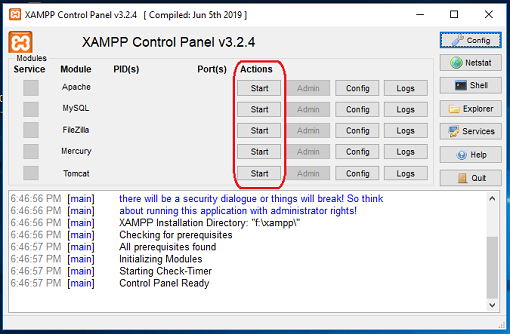
Fix an Issue of Apache not Starting in XAMPP
if any issue with Apache and MySQL module services not working in XAMPP. However, depending on the setup configuration. You should need to change the port number of the Apache. For example, by deault the “World Wide Web Services” under “Internet Information Services (IIS)” is also run on port 80 in your system that is why the two servers (applications) can not use (run) the same port simultaneously. Follow the instructions below to fix the problem with Apache and MySQL services.
Step-8
Open the XAMPP Control Panel. and click on Apache Module the “Config” button.
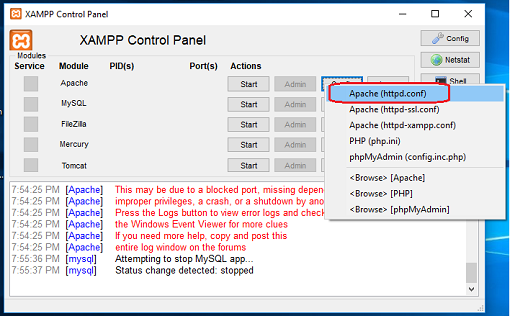
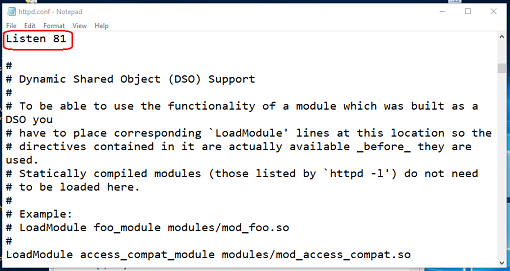
Step-9
By pressing the “Ctrl + F” key, find the “Listen 80” and replace it with another open port (like 81 or 9080) and save the file.
Your web development workflow. With Apache, MySQL, PHP, and phpMyAdmin at your fingertips, you have the tools you need to create, test, and refine your web applications offline. By following this comprehensive guide, you’ll be well-equipped to install, configure, and effectively utilize XAMPP for your Windows-based development projects.